GE self-cleaning ovens simplify maintenance by using high temperatures to burn away food residue. This guide provides step-by-step instructions for safe and effective cleaning processes.
What is a Self-Cleaning Oven?
A self-cleaning oven is a convenient appliance designed to automatically remove food residue and stains through high-temperature burning. GE self-cleaning ovens use intense heat (around 880°F) to turn grease and food particles into ash, which can then be easily wiped away. This feature eliminates the need for harsh chemicals, making cleaning safer and more efficient. The process is initiated via specific controls or buttons, depending on the model. While the oven handles the tough cleaning, it’s important to follow safety guidelines, such as proper ventilation and avoiding the use of abrasive cleaners; This innovative technology simplifies oven maintenance and ensures a cleaner, more hygienic cooking environment.
Benefits of Using a Self-Cleaning Oven
A self-cleaning oven offers unmatched convenience and efficiency. It eliminates the need for harsh chemicals, making the cleaning process safer and more environmentally friendly. The high-temperature cycle effectively removes tough food residue, saving time and effort. This feature also reduces the risk of chemical fumes and ensures a hygienic cooking environment. Additionally, self-cleaning ovens maintain their performance and appearance over time, as the cycle helps prevent grease buildup. With minimal manual scrubbing required, this option is ideal for busy households. Overall, it combines practicality, safety, and effectiveness, making it a valuable feature for modern kitchens.
Preparing for the Self-Cleaning Cycle
Prepare your kitchen by removing oven racks and ensuring proper ventilation. Clear the area around the oven and avoid using abrasive cleaners before starting the cycle.
Step 1: Prepare Your Kitchen
Before initiating the self-cleaning cycle, ensure your kitchen is well-prepared. Clear the area around the oven to avoid any obstructions or flammable materials. Open windows and turn on exhaust fans to maintain proper ventilation, as high temperatures and fumes may be released. Remove any combustible items, such as curtains or towels, from nearby surfaces. Cover nearby countertops and floors with heat-resistant materials to protect them from accidental spills or debris. Additionally, ensure all kitchen utensils and pot holders are kept away from the oven during the cleaning process. This preparation ensures a safe and efficient self-cleaning experience for your GE stove oven.
Step 2: Remove Oven Racks and Accessories
Before starting the self-cleaning cycle, remove all oven racks, trays, and utensils to prevent damage and ensure proper cleaning. Place racks in a safe location, such as the sink or a heat-resistant surface, for cleaning after the cycle. Wipe down racks with soap and water, avoiding abrasive cleaners that may scratch the finish. Additionally, remove any aluminum foil or drip pans, as these can melt or cause damage during high-temperature cleaning. For racks with heavy buildup, soak them in warm water and detergent before scrubbing. This step ensures the oven interior is fully exposed for optimal cleaning and prevents accessories from being damaged by extreme heat.
Step 3: Clean the Oven Exterior
Cleaning the oven exterior is essential for maintaining its appearance and functionality. Dampen a soft cloth with warm water and mild detergent, then gently wipe the oven door, window, and exterior surfaces. Avoid using harsh chemicals, abrasive cleaners, or scrubbers, as they may damage the finish. For tougher stains, lightly scrub with a non-abrasive sponge before wiping clean. Dry the exterior with a clean towel to prevent streaks. Regular cleaning prevents grease buildup and keeps the oven looking like new. Avoid using aluminum foil or other materials that could interfere with the cleaning process or damage the surfaces. This step ensures the oven remains hygienic and visually appealing.
Activating the Self-Cleaning Cycle
Press and hold the latch release button, slide it to the clean position, then turn the oven controls to the clean setting to initiate the cycle.
How to Start the Self-Cleaning Cycle
To initiate the self-cleaning cycle on your GE stove, ensure the oven is empty and all racks are removed. Press and hold the latch release button while sliding it into the clean position. For models without this feature, simply turn the oven controls to the “Clean” setting. Some models may require turning the temperature knob to a specific clean position or any high temperature setting. The oven will lock automatically, and high heat will burn away food residue. Allow the cycle to complete, as stopping it mid-process may require restarting. Always follow the manufacturer’s instructions for proper activation and safety. Ensure proper ventilation during the cycle due to high temperatures and fumes.
Using the Latch Release Button (for applicable models)
For GE stove models equipped with a latch release button, starting the self-cleaning cycle involves pressing and holding this button while sliding the oven latch into the clean position. Once the latch is fully engaged, release the button and ensure it clicks securely. The oven door will lock automatically to prevent opening during the high-temperature cleaning process. Some models may require turning the oven controls to the “Clean” position after releasing the button. Always follow the manufacturer’s instructions for your specific model to ensure proper activation and safety. Do not attempt to force the door open during the cycle, as this can damage the latch mechanism or cause injury. Proper use of the latch release button is essential for a safe and effective cleaning cycle.
Setting the Oven Controls to Clean Position
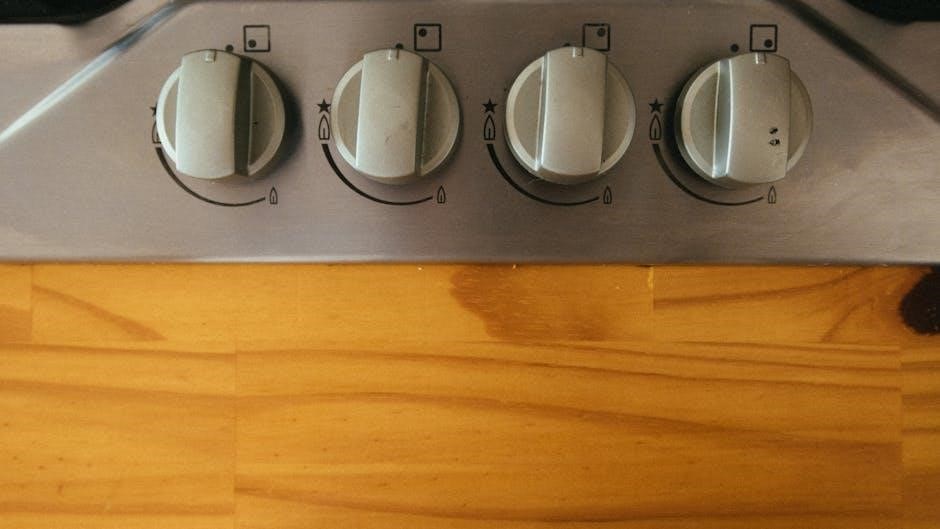
To activate the self-cleaning cycle, locate the oven controls and turn the oven set knob and temperature knob clockwise to the “Clean” position. If your model does not have a “Clean” position, turning the temperature knob to any setting will initiate the cycle. Ensure the oven door is completely closed and latched before starting. Some models may automatically lock the door once the cycle begins. After setting the controls, the oven will begin heating to a high temperature to burn away food residue. Always refer to your specific model’s instructions for exact steps, as control layouts may vary. Properly setting the controls ensures the self-cleaning process operates safely and effectively. This step is crucial for initiating the cleaning cycle correctly.

Safety Precautions During the Cleaning Process
Always follow safety guidelines to avoid burns or hazards. Keep children away, ensure proper ventilation, and never use abrasive cleaners during or after the cycle.
Understanding the High Temperatures Involved
GE self-cleaning ovens operate at extremely high temperatures, typically around 880 degrees Fahrenheit, to incinerate food residue. These temperatures are crucial for effectively breaking down tough grease and grime. However, they also pose significant safety risks. It’s essential to keep a safe distance from the oven during the cleaning cycle, as the exterior can become very hot. Proper ventilation is also critical to prevent the buildup of harmful fumes, including carbon monoxide, which can be released from the insulation during the cycle. Always ensure the kitchen is well-ventilated to maintain a safe environment.
Ventilation and Safety Measures
Ventilation and Safety Measures

Proper ventilation is crucial when using the self-cleaning feature on your GE oven. Open windows and doors to ensure fresh air circulation, reducing the concentration of fumes and odors. Turn on exhaust fans to help remove harmful gases, including carbon monoxide, released during the high-temperature cycle. Keep children and pets away from the oven to avoid burns or accidents. Never leave the self-cleaning process unattended, as continuous monitoring is essential for safety. Additionally, avoid using harsh chemicals or abrasive cleaners, as they can damage the oven’s finish. Always adhere to the manufacturer’s guidelines to ensure a safe and effective cleaning process.
Preventing Accidental Tipping of the Range
Preventing accidental tipping of your GE range is essential for safety. Ensure the appliance is properly installed and secured to the wall and floor using anti-tip brackets provided by the manufacturer. This prevents the range from tipping over during the self-cleaning cycle or normal use. Always follow GE’s installation guidelines to ensure stability. Additionally, check that the floor is level and the range is evenly positioned to avoid imbalance. Regularly inspect the anti-tip brackets to ensure they remain securely in place. By taking these precautions, you can safeguard your kitchen and prevent potential accidents caused by an unstable range.

Post-Cleaning Procedures
After the self-cleaning cycle, allow the oven to cool completely before wiping down the interior with a damp cloth. Clean racks separately and let them air dry.
Allowing the Oven to Cool Down
After the self-cleaning cycle completes, turn off the oven and let it cool completely. This is crucial for safety and ensures the surfaces are not damaged during cleaning. Opening the door while the oven is still hot can release harmful fumes and cause burns. Allow the oven to cool for several hours or overnight. Once cooled, the interior will be safe to wipe down. Proper cooling prevents accidental burns and ensures effective cleaning. Always wait until the oven is cool to the touch before proceeding with any post-cleaning tasks. This step is essential for maintaining both safety and the longevity of your appliance.
Wipe Down the Oven Interior
Once the oven has cooled, use a damp cloth to wipe down the interior surfaces, removing any ash or residue left from the self-cleaning cycle. Avoid using abrasive cleaners or scrubbers, as they can damage the oven’s finish. For tougher spots, a soft sponge or paper towels can be used. Wipe down the oven window to restore clarity and ensure visibility for future use. Remove and clean the oven racks separately, as they may require soaking or a gentle scrub. Do not use aluminum foil or harsh chemicals, as they can damage the oven’s surfaces. Regular wiping after cooling helps maintain the oven’s condition and prevents residue buildup.
Cleaning the Oven Racks
Clean the oven racks separately by removing them before the self-cleaning cycle. Soak the racks in warm, soapy water or a mixture of baking soda and water to loosen grime. Scrub gently with a soft sponge or brush to avoid scratching the finish. For tough grease, soak overnight and rinse thoroughly. Dry the racks before replacing them to prevent water spots. Avoid using abrasive cleaners or scouring pads, as they can damage the racks’ coating. Regular cleaning keeps the racks in good condition and ensures optimal oven performance. Always refer to your GE oven manual for specific rack cleaning instructions to maintain warranty and longevity.
Maintenance and Troubleshooting
Regular maintenance ensures your GE self-cleaning oven operates efficiently. Address common issues promptly to prevent malfunctions and extend the appliance’s lifespan. Troubleshooting tips are provided for ease of use.
Common Issues with the Self-Cleaning Feature
Common issues with GE self-cleaning ovens include malfunctioning latch mechanisms, incomplete cleaning cycles, and excessive smoke. High temperatures can cause carbon monoxide release, requiring proper ventilation. Additionally, using aluminum foil improperly may lead to fire hazards or damage. If the self-cleaning cycle fails to start, check if controls are set correctly. Some users report problems with the latch release button not engaging properly. In such cases, ensuring the oven is preheated and buttons are pressed firmly can resolve the issue. Always refer to the user manual for specific troubleshooting steps to address these common problems effectively.
How to Troubleshoot Common Problems
If the self-cleaning cycle doesn’t start, ensure the oven is preheated and the controls are set to the Clean position. For latch issues, press and hold the release button firmly while sliding it. Check for proper ventilation to prevent excessive smoke. If the cycle stops mid-way, allow the oven to cool before restarting. For incomplete cleaning, run a longer cycle or manually wipe residue with a damp cloth. Avoid using abrasive cleaners, as they can damage surfaces. Always unplug the oven before attempting manual cleaning. Refer to the user manual for specific model instructions and ensure all safety precautions are followed to resolve issues effectively.
Maintenance Tips for Longevity
Regularly clean the oven racks and exterior to maintain appearance and functionality. Avoid using abrasive cleaners or scrubbers, as they can damage the oven’s surface. Always refer to the user manual for specific cleaning recommendations. After each self-cleaning cycle, wipe down the interior with a damp cloth to remove ash. Ensure proper ventilation to prevent smoke buildup. Check and replace worn-out door seals to maintain heat efficiency. For models with smart features, update software regularly. Store oven racks separately when not in use to prevent scratching. Inspect the oven latch and clean it occasionally to ensure smooth operation. Follow these tips to extend the lifespan of your GE self-cleaning oven and keep it performing optimally.
GE self-cleaning ovens simplify maintenance, providing an efficient and effortless way to keep your appliance in excellent condition by properly adhering to manufacturer guidelines.
Final Thoughts on Using GE Self-Cleaning Ovens
GE self-cleaning ovens offer a convenient and efficient way to maintain your appliance. The high-temperature cleaning cycle effectively removes tough food residue, saving time and effort. While the process is generally reliable, it’s important to follow safety guidelines, such as ensuring proper ventilation and avoiding the use of oven cleaners. Regular maintenance and adherence to manufacturer instructions will extend the longevity of your oven. For optimal results, always refer to your specific model’s manual and take necessary precautions during the cleaning cycle. This feature is a valuable tool for keeping your oven in great condition, but user responsibility is key to safe and effective operation;
Encouragement to Follow Manufacturer Guidelines
Adhering to the manufacturer’s guidelines is crucial for safe and effective use of your GE self-cleaning oven. By following the instructions outlined in your owner’s manual, you ensure optimal performance and longevity of your appliance. Proper procedures, such as removing racks before the cycle and avoiding aluminum foil, prevent potential hazards. Ignoring these guidelines can lead to damage or safety risks. GE provides specific recommendations for each model, so taking the time to review and follow them will help you achieve the best cleaning results while maintaining your oven’s condition. Consistent compliance with these instructions ensures reliability and extends the lifespan of your appliance.