
Welcome to the Singer Curvy sewing machine, a versatile and user-friendly device designed for both beginners and experienced sewists. With models like the 8763, 8770, and 8780, it offers a wide range of stitches and advanced features. The instruction manual provides detailed guidance on setup, operation, and maintenance, ensuring seamless sewing experiences.
1.1 Overview of the Singer Curvy Sewing Machine
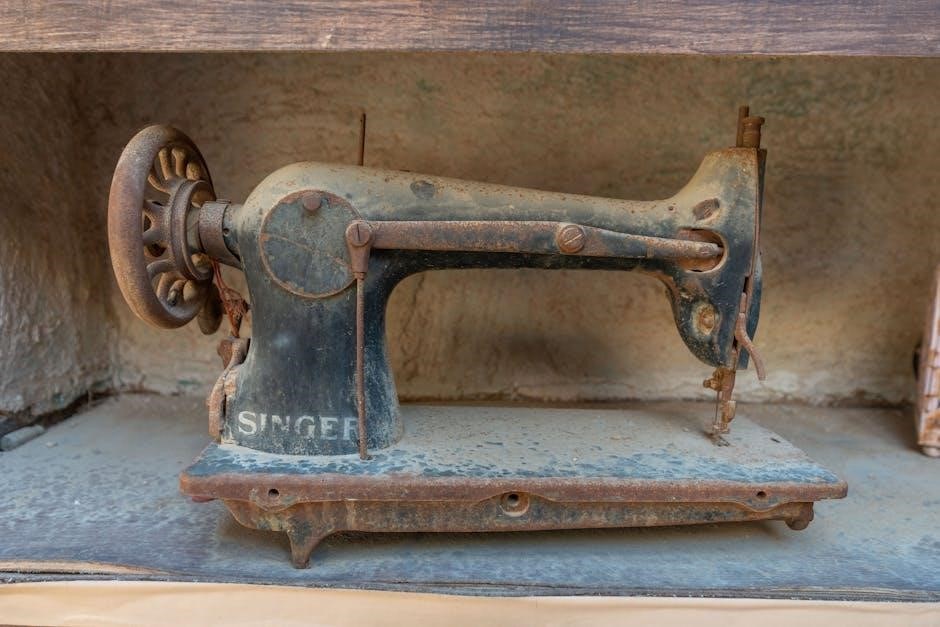
The Singer Curvy sewing machine is a versatile and intuitive device designed for sewing enthusiasts of all skill levels. Available in models such as the 8763, 8770, and 8780, it offers a wide range of features to cater to diverse sewing needs. With built-in stitches, including decorative and alphanumeric patterns, the Singer Curvy enables users to create intricate designs effortlessly. Its ergonomic design and user-friendly interface make it a favorite among sewists. The machine also comes with comprehensive instruction manuals, ensuring easy setup, operation, and maintenance. Whether for quilting, embroidery, or basic sewing, the Singer Curvy is a reliable companion for crafting beautiful projects.
1.2 Importance of the Instruction Manual
The instruction manual is essential for maximizing the potential of your Singer Curvy sewing machine. It provides detailed guidance on setup, operation, and maintenance, ensuring you understand the machine’s features and capabilities. The manual includes step-by-step instructions for threading, selecting stitches, and troubleshooting common issues. By following the manual, you can avoid errors, extend the machine’s lifespan, and enhance your sewing experience. Additionally, it serves as a quick reference for advanced functions and maintenance tips, making it indispensable for both new and experienced users. Accessing the manual online or in PDF format ensures you always have the information you need at your fingertips.

Model-Specific Instructions
Discover tailored guidance for Singer Curvy models 8763, 8770, and 8780. Each model offers unique features, from 225 stitches in the 8763 to advanced functions in the 8780.
2.1 Singer Curvy 8763 Setup and Features
The Singer Curvy 8763 is a feature-rich sewing machine designed for versatility. It boasts 225 built-in stitches, including decorative, alphanumeric, and utility options. Setup is straightforward, with an intuitive interface and clear instructions provided in the manual. Key features include automatic needle threading, adjustable stitch length and width, and a free-arm design for easy sewing of cuffs and hemming. The machine also offers a variety of presser feet for specialized tasks. For maintenance, the manual guides users on proper cleaning and lubrication. Troubleshooting tips are also included to resolve common issues like thread breakage or tension problems. This model is ideal for both beginners and experienced sewists, catering to a wide range of sewing projects.
2.2 Singer Curvy 8770 Operation Guide
The Singer Curvy 8770 operates smoothly, offering 225 built-in stitches, including alphanumeric patterns for customization. To start, ensure the machine is properly plugged in and the power button is pressed. Select stitches using the intuitive LCD screen and adjust settings with the control buttons. The machine features a start/stop button for hands-free sewing and automatic backstitching for secure seams. For threading, follow the manual’s guidance to ensure proper setup. Always turn off the machine when changing needles or adjusting the bobbin. The manual also provides tips for maintaining tension and troubleshooting common issues, ensuring optimal performance. Regular cleaning and lubrication, as outlined, will extend the machine’s lifespan and keep it running efficiently.
2.3 Singer Curvy 8780 Advanced Functions
The Singer Curvy 8780 boasts advanced features designed for intricate sewing projects. It includes a wide range of decorative stitches, automatic buttonhole settings, and compatibility with specialized attachments like the zipper foot. The machine’s large LCD screen allows for easy navigation and customization of settings. Advanced users can utilize the stitch editing feature to tailor patterns to their needs. The 8780 also supports sewing thin or thick fabrics with its adjustable presser foot pressure. For quilting and heavy-duty tasks, the machine’s robust construction ensures stability and precision. The instruction manual provides detailed guidance on maximizing these features, ensuring users can explore their full potential. Regular maintenance tips are also included to keep the machine performing at its best.
Safety Precautions
Always follow the Singer Curvy instruction manual’s safety guidelines to ensure safe operation. Turn off the machine when adjusting needles or changing settings to prevent accidents.
3.1 General Safety Guidelines
Adhering to general safety guidelines is essential for safe operation of the Singer Curvy sewing machine. Always turn off the machine and unplug it when making adjustments, such as threading the needle or changing settings. Keep loose clothing and long hair tied back to avoid entanglement. Ensure the work area is well-lit and free from clutter. Never leave the machine unattended, especially when children are nearby. Use only Singer-recommended accessories to maintain machine performance and safety. Regularly inspect the machine for damage or wear, addressing any issues promptly. Following these precautions helps prevent accidents and ensures optimal sewing experiences with your Singer Curvy.
3.2 Electrical Safety Tips
Ensure electrical safety while using the Singer Curvy by following these guidelines. Always unplug the machine when not in use or during maintenance. Avoid using damaged cords or plugs, as they can cause electrical hazards. Keep the machine away from water and moisture to prevent short circuits. Never touch electrical components with wet hands. Use a grounded power source to minimize the risk of electrical shock. Regularly inspect the power cord for signs of wear or damage, replacing it if necessary. Adhere to the voltage specifications outlined in the manual to prevent overload. By prioritizing electrical safety, you protect both yourself and your Singer Curvy sewing machine from potential harm.
Unpacking and Initial Setup
Unbox your Singer Curvy carefully, ensuring all components and accessories are included. Place the machine on a stable, flat surface and organize your workspace with essential tools nearby.
4.1 Unboxing and Inventory Check
Begin by carefully unboxing your Singer Curvy sewing machine, ensuring all components are intact. Check for any visible damage during transit. Inside the box, you should find the machine, a sewing table, power cord, foot control, and various presser feet. Additional accessories may include bobbins, needles, and a seam ripper. Refer to the provided list in the manual to confirm all items are included. If any parts are missing or damaged, contact Singer support immediately. Once verified, proceed to place the machine on a stable surface and prepare your workspace for setup. This step ensures a smooth start to your sewing journey with the Singer Curvy.
4.2 Placing the Machine and Workspace Preparation
Place the Singer Curvy sewing machine on a sturdy, flat surface, ensuring stability and even balance. Choose a well-ventilated area with good lighting to enhance visibility. Keep the machine away from direct sunlight and moisture to prevent damage; Clear the surrounding area of clutter to avoid accidents and ensure smooth operation. Position the machine near a power outlet to avoid using extension cords. Use a protective mat or cover to prevent scratching the surface. Organize your sewing tools and accessories within easy reach. Ensure the workspace is ergonomic, with the machine at a comfortable height to avoid strain. Proper placement and preparation will create an efficient and enjoyable sewing environment for your Singer Curvy.
Identifying Parts and Accessories
Familiarize yourself with the Singer Curvy’s components, including the needle, bobbin, presser foot, and spool pins. Accessories like the dust cover and additional feet enhance functionality and versatility.
5.1 External Components Overview
The Singer Curvy sewing machine features a sleek and intuitive design with several external components designed for ease of use. The stitch selector dial allows you to choose from various stitch patterns, while the reverse stitch lever enables reinforcing seams. The spool pins hold the thread in place, and the tension dials regulate thread tightness. The presser foot lever lifts and lowers the presser foot, ensuring fabric feeds smoothly. The handwheel controls needle movement, and the power switch activates the machine. Additionally, the stitch chart on the machine or in the manual provides a visual guide to stitch options. Understanding these components is essential for optimal performance and troubleshooting. Always refer to the manual for detailed descriptions and maintenance tips.
5.2 Accessories Included
The Singer Curvy sewing machine comes with a variety of accessories to enhance your sewing experience. These include multiple presser feet, such as the zigzag foot, zipper foot, and buttonhole foot, designed for specific tasks. A seam ripper is provided for carefully removing mistakes. Additional spool caps and bobbins ensure you have extras on hand. The machine also includes an extension table, offering more workspace for larger projects. Other accessories may vary by model but often include a dust cover, screwdriver, and embroidery hoops. These tools help you maintain and customize your machine, ensuring optimal performance. Always refer to the instruction manual for a full list of included accessories and their proper usage. Proper care and storage of these items will prolong their lifespan and functionality.

Threading and Bobbin Setup
Threading and bobbin setup are crucial steps for the Singer Curvy. Properly thread the machine and install the bobbin to ensure smooth stitching and optimal performance.
6.1 Threading the Machine
Threading the Singer Curvy sewing machine is a straightforward process when done correctly. Always start by raising the needle to its highest position. Locate the spool pin and guide the thread through the tension discs, ensuring it is seated properly. Gently pull the thread to remove any slack and create the correct tension. Next, pass the thread through the take-up lever and the needle bar. Finally, insert the thread through the needle eye from front to back. Pull the thread gently to secure it. Refer to the manual for visual guidance to ensure proper threading. Proper thread tension is essential for consistent stitching and to prevent machine issues.
6.2 Installing the Bobbin
Installing the bobbin on the Singer Curvy sewing machine is a crucial step for proper stitching. Begin by raising the needle to its highest position. Locate the bobbin cover plate and push the release button to the right to remove it. Take the bobbin and insert it into the bobbin case, ensuring the thread unwinds counterclockwise. Gently pull the thread to seat the bobbin correctly. Replace the bobbin cover and ensure it clicks into place. If the bobbin is not installed properly, it may cause uneven stitching or thread breakage. Always refer to the manual for specific guidance on bobbin installation for your Singer Curvy model to ensure optimal performance and prevent potential issues during sewing sessions.
Selecting Stitches and Modes
The Singer Curvy sewing machine offers a variety of stitches and modes to suit different sewing tasks. With built-in stitches, including decorative and alphanumeric options, users can easily customize their projects. The intuitive interface allows seamless switching between modes, ensuring flexibility and creativity in every stitch.
7.1 Stitch Selection Guide
The Singer Curvy sewing machine offers a wide variety of stitches, including straight, zigzag, and decorative options, to cater to diverse sewing needs. The stitch selection guide in the instruction manual helps users identify the best stitch for their project, ensuring optimal results. Users can easily navigate through the stitch options using the control panel, which features clear buttons or a dial for selection. The machine also includes an LCD screen in some models, allowing users to preview their chosen stitch before sewing. The manual provides detailed instructions on how to select and customize stitches, adjust lengths, and widths, making it easy to achieve professional-looking seams and embellishments. This guide is essential for maximizing the machine’s versatility and creativity in every sewing task.
7.2 Switching Between Sewing Modes
Switching between sewing modes on the Singer Curvy is straightforward, allowing users to adapt to different projects seamlessly. The machine features multiple modes, including straight stitch, zigzag, and decorative stitching. To change modes, simply use the mode button or dial located on the control panel. Some models also include an LCD screen for easy visualization of the selected mode. The instruction manual provides step-by-step guidance on how to navigate between modes, ensuring users can quickly adjust settings for various fabrics and techniques. Always refer to the manual for specific instructions on activating specialty modes, such as embroidery or heavy-duty stitching, to ensure optimal performance and desired results.

Maintenance and Upkeep
Regular maintenance ensures your Singer Curvy operates smoothly. Clean the machine, oil moving parts, and check for worn components. Refer to the manual for detailed steps.
8.1 Cleaning the Machine
Regular cleaning is essential to maintain the performance of your Singer Curvy. Turn off and unplug the machine before cleaning. Use a soft brush to remove lint and debris from the bobbin area, tension discs, and stitch plate. Avoid using harsh chemicals or abrasive materials that could damage the finish. Gently wipe down the exterior with a damp cloth. For stubborn lint, a small vacuum cleaner or compressed air can be used. Ensure all parts are dry before turning the machine back on. Cleaning after each project helps prevent dust buildup and ensures smooth operation. Refer to the manual for specific cleaning instructions tailored to your Singer Curvy model.
8.2 Oiling and Lubrication
Regular oiling is crucial to maintain the smooth operation of your Singer Curvy sewing machine. Use only high-quality sewing machine oil, as specified in the manual. Locate the oil ports, typically found near the bobbin area or hook mechanism. Apply a few drops of oil to these points after every 10 hours of use or when you notice increased noise or friction. Avoid over-oiling, as excess oil can attract lint and dust. Gently turn the handwheel to distribute the oil evenly. For models like the 8763, 8770, and 8780, refer to the manual for specific lubrication points. Proper oiling ensures longevity and optimal performance of your machine.
Troubleshooting Common Issues
Identify and resolve common problems like thread breakage or uneven stitching by checking tension settings, ensuring proper bobbin installation, and cleaning the machine regularly.
9.1 Diagnosing Thread Breakage
Thread breakage can be frustrating, but it’s often due to simple, fixable issues. First, check the thread quality and ensure it’s suitable for your fabric. Old or low-quality thread may break easily. Next, inspect the needle for damage or dullness; a blunt needle can cause excessive friction. Verify that the needle is correctly installed and aligned with the machine’s shuttle. Also, ensure the bobbin is properly seated and threaded. Check the tension settings on both the top and bottom threads, as uneven tension is a common cause of breakage. Finally, clean the machine to remove any debris that might interfere with smooth operation. By systematically addressing these areas, you can identify and resolve the issue efficiently.
9.2 Resolving Tension Problems
Tension issues are common but can be easily resolved. Start by checking the thread tension settings on both the top and bottom threads. Ensure they are balanced; too tight or too loose can cause fabric puckering or uneven stitching. Next, verify that the thread is properly threaded through the machine, following the manual’s guidance. Incorrect threading paths can disrupt tension. Also, check the needle size and type to ensure they match your fabric. If issues persist, clean the tension discs and bobbin area to remove any lint or debris. Finally, test the machine on a scrap fabric to confirm the tension is adjusted correctly. Regular maintenance and correct setup will help prevent future tension problems.
Advanced Features and Techniques
10.1 Using Decorative Stitches
The Singer Curvy sewing machine offers a wide variety of decorative stitches to enhance your sewing projects. With over 200 built-in stitches, including intricate patterns and alphanumeric designs, you can create unique and personalized fabrics. The machine’s intuitive interface allows easy selection of decorative stitches, making it simple to experiment with different styles. To use decorative stitches, select your desired pattern using the control panel, adjust the stitch length and width as needed, and begin sewing. The instruction manual provides detailed guidance on how to optimize these stitches for various fabrics and projects. This feature is perfect for adding artistic touches to garments, home decor, or crafts, ensuring professional-looking results every time. Regularly refer to the manual for troubleshooting and maintenance tips to keep your machine performing at its best. By mastering decorative stitches, you can unlock endless creative possibilities and take your sewing skills to the next level. Always ensure proper thread tension and fabric alignment for flawless stitching. With practice, you’ll achieve stunning, intricate designs that elevate your sewing projects. The Singer Curvy’s advanced stitching capabilities make it an excellent choice for sewists seeking versatility and creativity in their work.
10.2 Sewing Buttons and Zippers
The Singer Curvy sewing machine simplifies tasks like sewing buttons and zippers with its specialized features. For buttons, use the automatic buttonhole function, which ensures perfectly sized holes. Place the button on the fabric, select the buttonhole stitch, and let the machine create professional-looking results. For zippers, switch to the zipper foot, which provides clear visibility and control. Align the zipper teeth with the edge of the fabric, lower the presser foot, and sew in place. The machine’s precise stitching ensures a smooth, even finish. Refer to the manual for step-by-step guidance on these techniques. With the Singer Curvy, you can confidently handle these essential sewing tasks, achieving professional-quality results effortlessly. Regular practice and proper thread tension will enhance your outcomes, making button and zipper application a breeze. This feature-rich machine is designed to make your sewing projects efficient and enjoyable, whether you’re repairing clothes or creating new garments. Always follow the manual’s instructions for optimal performance and to maintain your machine’s functionality. By mastering these techniques, you’ll expand your sewing capabilities and tackle a variety of projects with confidence. The Singer Curvy’s user-friendly design and comprehensive features make it an ideal choice for sewists of all skill levels, ensuring every project is completed to perfection.

Accessories and Optional Equipment
Explore a range of optional accessories, including extension tables, hoops, frames, and sewing notions, to enhance your sewing experience with the Singer Curvy. Visit the official Singer website or authorized dealers for genuine parts and equipment tailored to your machine.
11.1 Useful Accessories for Enhanced Sewing
Enhance your sewing experience with Singer Curvy by exploring a variety of useful accessories. Extension tables provide extra workspace for larger projects, while specialized hoops and frames are ideal for embroidery and quilting. Additional sewing notions, such as spool pins, scissors, and embroidery supplies, can streamline your workflow. Optional equipment like extra bobbin cases and presser feet (e.g., zipper, buttonhole, or blind hem feet) expand the machine’s capabilities. Visit the Singer website or authorized dealers to discover genuine accessories designed for your Singer Curvy model. These tools not only improve efficiency but also help maintain the machine’s performance and warranty. Choose the right accessories to elevate your sewing projects.
Warranty and Support Information
Singer Curvy machines come with a limited warranty covering parts and labor. Visit Singer’s official website for warranty details and customer support contact information.
12.1 Understanding Your Warranty
The Singer Curvy sewing machine comes with a limited warranty that covers defects in materials and workmanship. The warranty period varies depending on the model and region, typically ranging from 1 to 5 years. It is essential to review the warranty terms provided in your instruction manual or on Singer’s official website. The warranty is non-transferable and requires proof of purchase. Coverage excludes damage caused by misuse, improper maintenance, or normal wear and tear; For detailed warranty conditions, refer to the manual or contact Singer’s customer support team. Understanding your warranty ensures you can address any issues promptly and maintain your machine effectively.
12.2 Contacting Singer Support
For any inquiries or issues with your Singer Curvy sewing machine, Singer offers multiple support channels. Visit their official website to access contact information, including phone numbers, email, and live chat options. Support is available during business hours, and representatives are ready to assist with troubleshooting, repair services, or warranty-related questions. Additionally, Singer provides FAQs and downloadable resources on their website to help resolve common issues independently; When reaching out, ensure you have your machine’s serial number and model number handy for quicker assistance. Singer’s dedicated customer service team aims to provide timely and effective solutions to ensure your sewing experience remains seamless and enjoyable.