This manual provides essential guidelines for installing James Hardie products, ensuring proper techniques and safety measures to achieve durable, long-lasting results. Follow instructions carefully for optimal performance and warranty compliance.
Overview of Hardie Products and Their Benefits
James Hardie products, like HardiePlank lap siding, are renowned for their durability and resistance to fire, moisture, and pests. Designed for various climates, they offer long-lasting performance and low maintenance. HardieZone technology ensures materials are tailored to specific weather conditions, enhancing resilience. These products boost curb appeal and energy efficiency while meeting high safety standards. Their versatility in design and color options allows homeowners to achieve desired aesthetics. Investing in Hardie products ensures a durable, weather-tight exterior that withstands the elements and adds value to properties.
Importance of Following the Installation Manual
Adhering to the installation manual ensures compliance with safety standards and manufacturer guidelines, preventing potential issues like water infiltration or structural damage. Proper techniques guarantee optimal performance and warranty validity, as deviations can lead to product failure. The manual provides specific instructions tailored to different climates and materials, ensuring durability and efficiency. By following the guidelines, installers can achieve a professional finish and maintain the integrity of James Hardie products, avoiding costly repairs and ensuring long-term satisfaction for homeowners.
Pre-Installation Requirements
Ensure site preparation and safety measures are in place before starting. Verify HardieZone product suitability and review local building codes to meet all requirements effectively.
Checking the Correct HardieZone Product Instructions
Before installation, verify the correct HardieZone product instructions by visiting HardieZone.com or calling 1-866-942-7343. Ensure the selected product matches your climate zone for optimal performance. Incorrect materials may lead to issues like shrinkage or water infiltration. Always confirm product suitability to avoid installation problems; James Hardie provides specific guidelines for different regions to ensure durability and compliance with local building standards. Proper selection is critical for a successful and long-lasting installation.
Site Preparation and Safety Measures
Ensure the installation site is clear of debris and obstructions. Wear proper safety gear, including gloves, safety glasses, and a dust mask. Keep power tools well-maintained and follow manufacturer guidelines. Avoid cutting or grinding indoors to prevent dust accumulation. Use wet suppression or vacuum systems for dust control. Proper ventilation is essential to minimize exposure to airborne particles. Secure the area to prevent accidents and ensure compliance with local safety regulations. A well-prepared site ensures a smooth and safe installation process.

Handling and Storage Guidelines
Store Hardie products flat and dry to prevent damage. Handle with care to avoid bending or breaking. Keep materials away from moisture and extreme temperatures.
Proper Storage Conditions for Hardie Products
Store Hardie products in a dry, flat, and well-ventilated area to prevent damage. Avoid exposure to direct sunlight, moisture, or extreme temperatures. Keep materials away from ground contact and cover with breathable material if necessary. Ensure the storage area is clean and free from debris. Do not stack products excessively to avoid bending or warping. Follow manufacturer guidelines for specific product storage requirements to maintain quality and performance.
Safe Handling Practices to Avoid Damage
Handle Hardie products with care to prevent damage. Use appropriate lifting techniques or equipment to avoid bending or breaking materials. When cutting, use power tools with dust suppression or vacuum systems to minimize dust. Never grind or cut indoors without proper ventilation. Avoid dry sweeping; instead, use wet methods or vacuums to collect dust. Always wear safety gear, including gloves, safety glasses, and a dust mask, when handling products; Proper handling ensures a safe and successful installation process.

Tools and Materials Needed
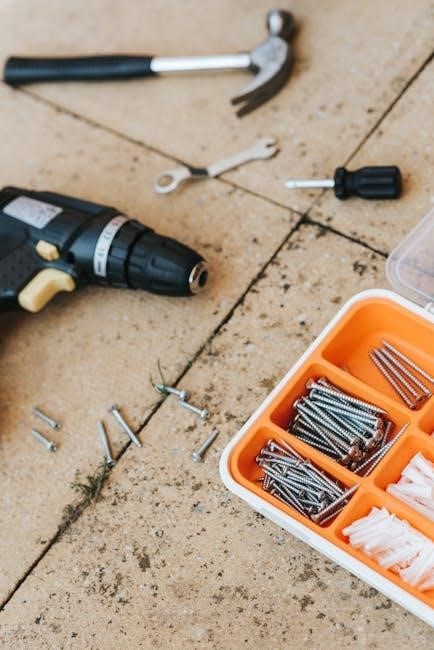
Essential tools include circular saws, drills, and utility knives. Use stainless steel finish nails and weather-resistive barriers. Safety gear like gloves and masks is crucial.
Recommended Tools for Hardie Installation
Essential tools include circular saws, drills, and utility knives. Stainless steel finish nails are recommended to prevent corrosion. Safety gear like masks and gloves is crucial. Ensure all tools are suitable for fiber-cement materials. Proper equipment ensures accurate cuts and secure fastening. Always consult James Hardie’s technical resources for specific tool recommendations and guidelines.
Essential Materials for a Successful Install
Key materials include weather-resistive barriers, underlays, and stainless steel finish nails. Ensure proper flashing and sealants for joints. Use Class 4 vapor-permeable membranes for added protection. HardieZone-specific products are crucial for climate adaptability. Verify all materials meet local building codes and James Hardie’s specifications. Proper underlays enhance durability and prevent water infiltration. Always refer to the manufacturer’s guidelines for approved materials to ensure a secure and long-lasting installation.
Installation Process Overview
The process involves systematic steps, from site preparation to final inspection, ensuring compliance with manufacturer guidelines for proper siding installation and weather-resistive barrier application.
General Requirements for HardiePlank Lap Siding
HardiePlank lap siding can be installed over braced wood or steel studs, spaced a maximum of 24 inches on center. Ensure studs are 20-16 gauge steel or equivalent wood strength. A minimum 7/16-inch thick substrate is required for direct installation. Weather-resistive barriers must be applied beforehand to prevent water infiltration. Proper fastening techniques, such as using stainless steel finish nails, are essential to avoid nail holes and ensure a secure, long-lasting installation. Always follow manufacturer guidelines for optimal results and durability.
Step-by-Step Installation Guidelines
Begin by ensuring the surface is clean and flat. Start with the bottom course, aligning planks level. Cut planks using a circular saw outdoors to avoid dust. Fasten planks to studs using 1-1/2″ galvanized or stainless steel nails, spaced 16 inches on center. Leave 1/8″ gaps at joints for expansion. Stagger joints between courses for a seamless look. Check alignment regularly and secure loose planks immediately to prevent misalignment issues. Always refer to the manual for specific details to ensure a professional finish.
Weather-Resistive Barriers and Underlays
Weather-resistive barriers and underlays are crucial for protecting the wall assembly from moisture. Always use building paper type barriers, as recommended by James Hardie, to ensure durability and weather resistance.
Importance of Weather-Resistive Barriers
Weather-resistive barriers are essential for preventing moisture infiltration, which can cause structural damage and degrade insulation performance. They protect the wall assembly from rain, snow, and humidity, ensuring long-term durability. James Hardie strongly recommends using building paper type barriers to maintain integrity and prevent water-related issues. Properly installed barriers also help regulate vapor movement, reducing the risk of mold and rot. Failure to use appropriate barriers may void warranties and compromise the installation’s effectiveness. Always follow manufacturer guidelines for optimal results.
Recommended Underlays for Hardie Products
James Hardie recommends using high-quality weather-resistive barriers like HardieWrap Weather Barrier or RAB Board for optimal protection. These underlays provide a vapor-permeable membrane that shields walls from moisture, reducing the risk of mold and rot. They are compatible with all Hardie siding products and ensure compliance with building codes. For specific climate zones, such as 2-8, these underlays are certified to withstand various weather conditions. Always follow installation guidelines to maximize performance and warranty coverage. Proper underlay installation is crucial for long-term durability and structural integrity.
Climate-Specific Installation Considerations
James Hardie offers products tailored to specific climates, such as HZ5 Zone siding for colder regions. Ensure selections match local weather conditions for optimal performance and durability.
HardieZone Product Selection for Different Climates
James Hardie’s HardieZone system categorizes products into zones based on regional weather conditions, ensuring optimal performance. For colder, wetter climates, HZ5 Zone siding is recommended, offering enhanced moisture resistance and durability. In coastal or high-wind areas, specialized products are designed to withstand extreme conditions. Always verify local building codes and climate requirements before selection. Proper zone-specific installation minimizes shrinkage and water infiltration risks. Visit HardieZone.com for detailed product recommendations tailored to your region.
Special Instructions for High-Wind Areas
For high-wind regions, James Hardie recommends using HZ5 Zone products, designed to withstand extreme weather conditions. Ensure proper fastening with stainless steel nails, spaced 16 inches on center for added stability. Check local building codes for specific requirements. Seal all gaps and joints with approved weatherproofing materials to prevent air leaks. For installations above 60 feet, consult James Hardie technical support for customized guidance. Always verify product suitability for your area via HardieZone.com to ensure compliance and durability.
Safety Precautions During Installation
Always use proper safety gear, including gloves and safety glasses. Ensure good ventilation when cutting materials and avoid dry sweeping dust. Follow power tool safety guidelines.
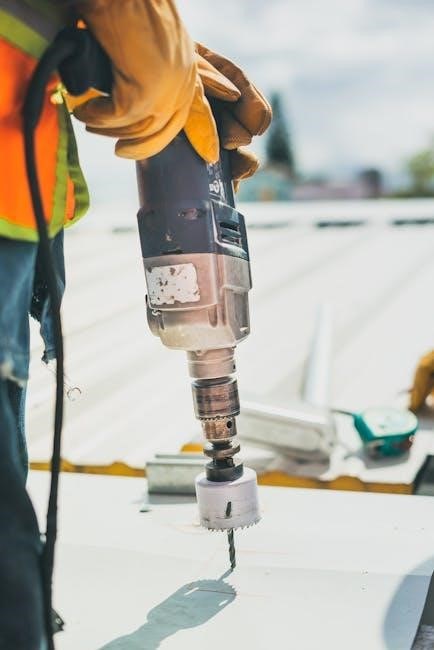
Proper Use of Power Tools and Safety Gear
Always use power tools in well-ventilated areas, avoiding indoor cutting without proper extraction. Wear safety glasses, gloves, and a respirator when cutting or sanding materials. Ensure all tools are in good working condition and meet manufacturer standards. Never operate power tools near open flames or sparks. Keep loose clothing tied back and avoid jewelry that could catch in machinery. Regularly inspect safety gear for damage and replace as needed to ensure optimal protection during installation tasks.
Dust Suppression and Ventilation Guidelines
Always use wet dust suppression or vacuum systems when cutting or sanding to minimize airborne dust. Ensure proper ventilation in work areas by opening windows or using fans. Avoid grinding or cutting indoors without adequate extraction. Poor ventilation can lead to dust accumulation, posing health risks and complicating installation. Never dry sweep dust; instead, use wet methods or vacuum systems to prevent airborne particles. Proper ventilation ensures a safer working environment and prevents potential issues with product performance and installation quality.

Technical Documentation and Resources
Access comprehensive technical guides, including installation videos, CAD files, and clearance requirements, to ensure accurate and compliant James Hardie product installations.
Accessing Installation Videos and CAD Files
James Hardie provides detailed installation videos and CAD files to guide professionals through precise measurements and proper techniques. These resources ensure compliance with manufacturer guidelines, offering visual and technical support for complex projects. Accessible online, they cover product-specific instructions, clearance requirements, and best practices for a flawless installation. Utilize these tools to verify measurements, plan layouts, and troubleshoot common issues, ensuring your project meets both safety and quality standards.
Clearance Requirements and Technical Support
James Hardie specifies minimum clearance requirements for siding and trim products to ensure proper fit and prevent water infiltration. Technical support is available for complex installations or unique architectural designs. Contact their support team for customized guidance, ensuring compliance with local building codes and manufacturer recommendations. This support ensures your project adheres to safety standards and achieves optimal durability and performance.
Troubleshooting Common Installation Issues
Addressing common issues like shrinkage, water infiltration, and fastening problems is crucial for a durable installation. Follow guidelines to resolve these issues promptly and effectively.
Addressing Shrinkage and Water Infiltration
Shrinkage and water infiltration are common issues that can arise during Hardie installation. Proper sealing of gaps and joints is essential to prevent water entry. Ensure all flashings are correctly installed and maintain a weather-tight seal. If shrinkage occurs, inspect for loose fasteners and resecure as needed. Use recommended weather-resistive barriers to minimize moisture penetration. Addressing these issues promptly ensures long-term durability and prevents structural damage. Always follow James Hardie’s guidelines for resolving such problems effectively.
Dealing with Fastening and Alignment Problems
Fastening and alignment issues can impact the integrity of Hardie installations. Ensure proper nail penetration and spacing to avoid loose panels. Use stainless steel finish nails as recommended. Misalignment can lead to uneven surfaces; check each course for straightness. If fasteners are over-tightened, they may cause warping. For uneven areas, consider shimming to level the surface. Regularly inspect fastening points during installation to prevent long-term issues. Proper alignment and secure fastening are critical for a durable, weather-tight finish. Address these issues promptly to maintain product performance and warranty compliance.
Successful Hardie installation requires adherence to guidelines, proper tools, and safety measures. Ensure all steps are followed meticulously to guarantee a durable, long-lasting result and warranty compliance.
Final Checklist for a Successful Installation
Ensure all HardieZone product instructions are verified for your climate. Confirm site preparation, safety measures, and proper tools are in place. Verify materials and weather-resistive barriers are correctly installed. Double-check handling and storage guidelines to avoid damage. Ensure all fastening and alignment requirements are met. Conduct a final inspection for any gaps or defects. Consult technical support if issues arise. Document the installation process for future reference. Adhere strictly to manufacturer guidelines for a durable and long-lasting result.
Importance of Following Manufacturer Guidelines
Adhering to James Hardie’s guidelines ensures compliance with product-specific requirements, minimizing risks of water infiltration and structural issues. Proper installation maintains warranty coverage and guarantees long-term durability. Deviating from instructions can lead to installation failures or void warranties. Always verify HardieZone product suitability for your climate and consult technical support for unique scenarios. Following manufacturer guidelines ensures safety, optimal performance, and compliance with building standards, safeguarding your investment in Hardie products.