Radiographic Positioning Guide: An Overview
This guide details essential radiographic techniques, focusing on practical application and clear terminology for both students and experienced practitioners.
Optimal image quality relies on precise positioning, utilizing projections, body surfaces, and positions like erect or supine for accurate diagnosis.
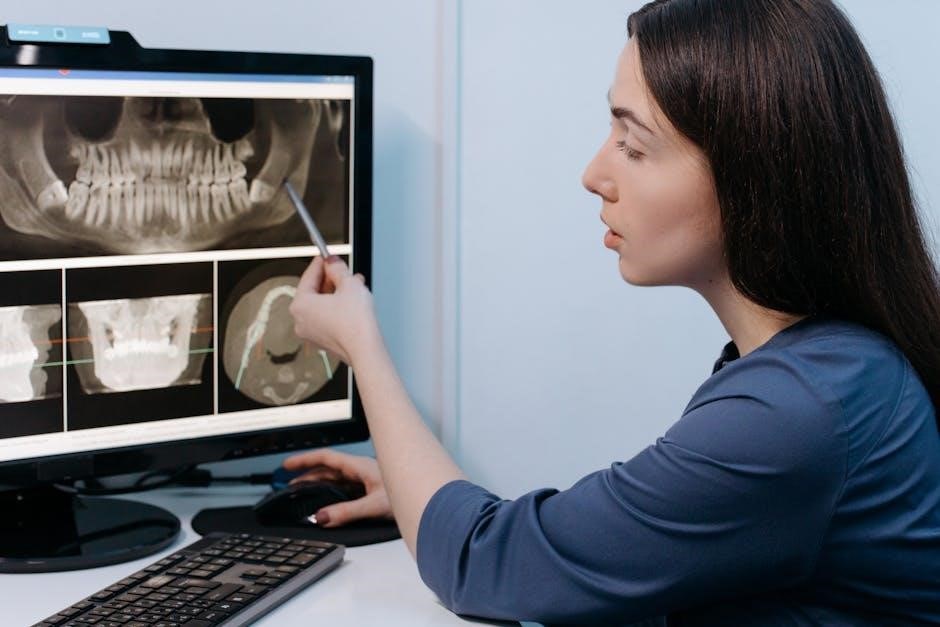
Advanced methods, such as tube shift radiography and CT, aid localization, while range of motion measurements enhance comprehensive patient evaluation.
Radiographic positioning is the cornerstone of diagnostic imaging, directly impacting image quality and diagnostic accuracy. It’s far more than simply placing a patient; it’s a systematic process demanding a thorough understanding of anatomy, pathology, and the physics of radiation.
A practical, how-to approach is crucial, avoiding unnecessary complexity while ensuring consistently high-quality images. This involves mastering fundamental techniques and recognizing the importance of precise patient preparation and alignment.
Effective positioning minimizes distortion, superimposition, and magnification, allowing radiologists to accurately interpret the radiographic anatomy. Resources like Bontrager’s Handbook serve as vital references, continually updated with best practices.
Understanding positioning terminology – projections, body habits, and surfaces – is paramount for clear communication and standardized procedures within the radiology department.
Anatomical Position & Terminology
The foundational anatomical position – standing erect, facing forward with eyes directed ahead – serves as the universal reference for describing all body parts and movements. This standardized posture ensures consistent communication amongst healthcare professionals.
Radiographic terminology is equally crucial. Projections define the direction of the x-ray beam (e.g., PA, Lateral), while body positions describe how the patient is oriented (supine, prone, erect). Understanding body surfaces – anterior, posterior, superior, inferior – is essential for accurate positioning.
Precise terminology avoids ambiguity, ensuring that radiographic procedures are repeatable and comparable. Consistent application of these terms is vital for accurate documentation and effective patient care.
Mastering this vocabulary is the first step towards proficient radiographic technique and reliable image interpretation.
Radiographic Projections: A Core Concept
Radiographic projections are the fundamental methods by which structures are visualized on a radiographic image. They dictate the angle and direction of the central x-ray beam, influencing the resulting image’s appearance and diagnostic value.
Common projections include anteroposterior (AP) and posteroanterior (PA), where the beam travels through the body from front to back or vice versa. Lateral projections involve a side-to-side beam direction. Each projection highlights different anatomical features.
Selecting the appropriate projection is critical for demonstrating specific pathology and minimizing superimposition of structures. Understanding the principles behind each projection allows technologists to adapt techniques to individual patient needs.
Proper projection technique ensures accurate anatomical representation and facilitates optimal image interpretation by radiologists.

Upper Extremity Positioning
Precise positioning of the shoulder, elbow, wrist, and hand is crucial for visualizing anatomical structures and detecting subtle fractures or abnormalities.
Shoulder Positioning Techniques
Achieving optimal shoulder images requires meticulous attention to patient positioning and technique. Standard projections include the anteroposterior (AP) and axial views, each designed to highlight different aspects of the glenohumeral joint and surrounding structures.
For AP projections, the patient should be positioned upright, with the shoulder directly against the image receptor. Central ray perpendicularity is vital, typically directed to the glenohumeral joint. Axial projections, often utilized to assess the humeral head, necessitate specific patient rotation and beam angulation.
Careful consideration of patient comfort and immobilization is paramount, as movement can significantly degrade image quality. Radiographic overlays and anatomical landmarks serve as guides for accurate positioning, ensuring comprehensive evaluation of potential pathologies.
Elbow and Forearm Positioning
Radiographic evaluation of the elbow and forearm demands precise positioning to visualize bony structures and joint spaces effectively. Common projections include AP and lateral views, alongside specialized techniques like the oblique projection for specific clinical indications.
AP elbow positioning requires the patient to be supinated, with the elbow flexed to approximately 90 degrees. The central ray should be directed perpendicular to the mid-condyle of the humerus. Lateral projections necessitate careful attention to forearm pronation and elbow flexion.
Accurate landmark identification – such as the epicondyles and olecranon process – is crucial for consistent and reproducible results. Proper immobilization minimizes motion artifacts, leading to diagnostic-quality images.
Hand and Wrist Positioning
Radiographic assessment of the hand and wrist requires meticulous technique to demonstrate subtle fractures and soft tissue abnormalities. Standard projections include PA, lateral, and oblique views, each offering unique anatomical perspectives.
PA hand positioning typically involves a closed fist or slight extension of the fingers, ensuring all structures are visible. The central ray is directed perpendicular to the third metacarpal; Lateral views require careful attention to wrist pronation or supination.
Oblique projections are utilized to visualize the carpal bones more clearly. Accurate alignment and immobilization are paramount to prevent motion blurring and ensure diagnostic image quality. Proper patient communication is key for successful positioning.
Digital Radiography Considerations for Upper Extremity
Digital radiography (DR) significantly impacts upper extremity imaging, offering advantages like wider dynamic range and post-processing capabilities. However, specific considerations are crucial for optimal results.
Exposure factors must be carefully adjusted to minimize noise and maximize signal-to-noise ratio, leveraging DR’s sensitivity. Patient dose reduction is a key benefit, but proper collimation remains essential.
Image receptor plate (IRP) positioning is critical; ensure complete coverage of the anatomy of interest. Artifacts, such as those from jewelry or clothing, must be avoided. Post-processing tools allow for windowing and leveling to enhance visualization of subtle details, improving diagnostic confidence.
Lower Extremity Positioning
Precise positioning of the hip, femur, ankle, and foot is vital for accurate lower extremity imaging, avoiding common errors for optimal diagnostic quality.
Hip and Pelvis Positioning
Accurate hip and pelvis radiography demands meticulous attention to detail, ensuring proper anatomical alignment and minimizing distortion. Common projections include the anteroposterior (AP) pelvis, utilized for evaluating bony structures and joint spaces.
Patient positioning is crucial; typically, patients are supine with symmetrical rotation. Careful attention must be paid to centering, utilizing the anterior superior iliac spines (ASIS) as landmarks.
Specific techniques may involve slight hip flexion to optimize visualization of the femoral heads. Understanding potential pitfalls, such as obliquity or improper shielding, is essential for producing diagnostic-quality images.
Proper collimation and technique factors are also paramount, balancing image quality with minimizing patient dose.
Femur and Knee Positioning
Radiographic evaluation of the femur and knee requires precise positioning to demonstrate anatomical structures effectively. Standard projections include anteroposterior (AP) and lateral views of the knee, and AP and lateral views of the femur.
For AP knee views, patients are typically positioned with the knee slightly flexed, ensuring patellar visualization. Rotation must be minimized to avoid distortion of the tibial and femoral condyles.
Lateral projections require careful alignment of the epicondyles of the femur.
Femur imaging necessitates centering to the greater trochanter for AP views. Attention to collimation and technique factors is vital for optimal image quality and reduced patient exposure.
Ankle and Foot Positioning
Radiographic assessment of the ankle and foot demands meticulous positioning to visualize bony structures and soft tissues accurately. Common projections include anteroposterior (AP), lateral, and oblique views.
AP ankle views are obtained with the patient’s foot in a neutral position, ensuring minimal rotation. The central ray is directed perpendicular to the medial malleolus.
Lateral projections require the patient to dorsiflex their foot, aligning the lateral malleolus with the central ray.
Oblique views aid in visualizing the medial or lateral ankle structures. Proper immobilization and collimation are crucial for minimizing motion and maximizing image quality, leading to accurate diagnoses.
Lower Extremity Positioning: Common Errors
Achieving optimal lower extremity radiographs requires vigilance against common positioning errors. Rotation is a frequent issue, particularly in AP hip and knee views, distorting anatomical landmarks.
Incorrect central ray angulation can lead to foreshortening or elongation of structures, obscuring pathology. Patient positioning, such as inadequate immobilization or improper weight-bearing, introduces motion blur.
Failure to collimate effectively increases patient dose and reduces image contrast. Additionally, neglecting anatomical landmarks during positioning compromises diagnostic accuracy.
Consistent quality control and awareness of these pitfalls are essential for producing high-quality images and reliable interpretations.

Thoracic & Abdominal Positioning
Techniques encompass PA and lateral chest views, supine and erect abdominal projections, and AP/lateral spine imaging for comprehensive evaluation of these critical areas.
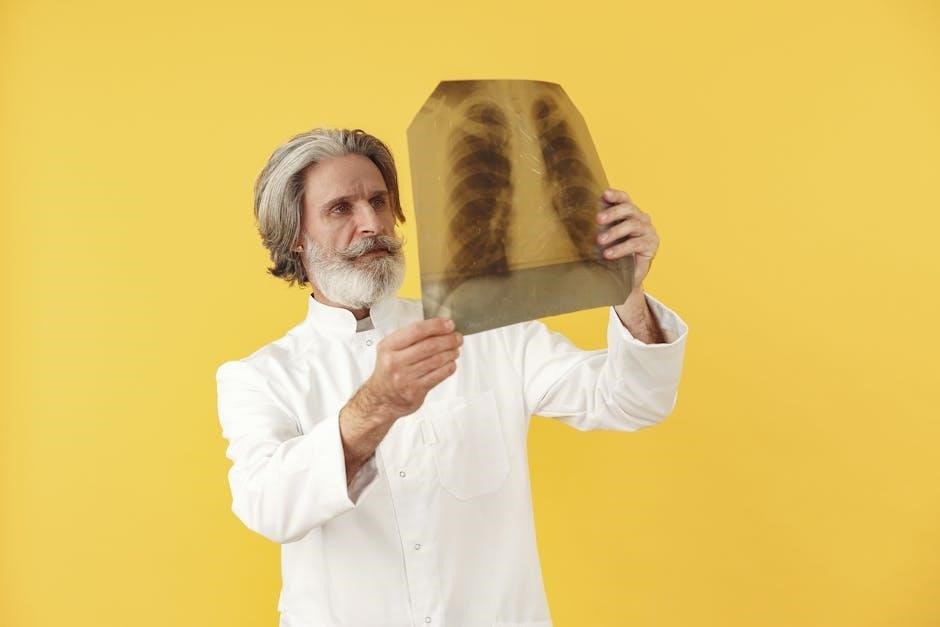
Chest Radiography: PA and Lateral Views
Posteroanterior (PA) chest radiography is a fundamental projection, requiring the patient to stand with their shoulders relaxed and arms elevated. Central ray penetration must be perpendicular to the mid-thorax, visualizing the heart and lungs effectively.
Lateral chest radiography complements the PA view, demonstrating anterior-posterior structures. The patient is positioned laterally, with the affected side against the image receptor. Proper rotation is crucial, ensuring the sternum is visible without excessive mediastinal widening.
Accurate positioning minimizes distortion and optimizes diagnostic quality. Inspiration is essential for both views, maximizing lung expansion and facilitating accurate assessment of pulmonary pathology. Careful attention to collimation and technique factors further enhances image clarity.
These views, when interpreted together, provide invaluable information regarding cardiac size, pulmonary vasculature, and the presence of any abnormalities within the thoracic cavity.
Abdominal Radiography: Supine and Erect Positions
Abdominal radiography utilizes supine and erect positions to evaluate various gastrointestinal conditions. The supine view, taken with the patient lying flat, provides a general overview of abdominal structures, identifying potential obstructions or free air.
The erect abdominal view, performed with the patient standing or upright, is crucial for detecting pneumoperitoneum – free air within the peritoneal cavity – indicative of perforation. Proper patient preparation, including fasting, is essential to minimize bowel gas interference.
Central ray penetration should be perpendicular to the mid-abdomen, ensuring accurate visualization. Careful attention to collimation reduces patient dose and improves image quality. Both views are often acquired sequentially for comprehensive assessment.

Interpretation requires careful consideration of bowel gas patterns, organ outlines, and the presence of any abnormal calcifications or fluid collections.
Spine Radiography: AP and Lateral Projections
Spine radiography commonly employs AP (anteroposterior) and lateral projections for evaluating bony structures and identifying abnormalities like fractures, dislocations, or degenerative changes. The AP projection provides a frontal view of the vertebral column, assessing alignment and intervertebral disc spaces.
The lateral projection, taken from the side, demonstrates the vertebral bodies’ shape and any potential compression fractures. Precise positioning is critical; patients must maintain a neutral spine to avoid obscuring anatomical landmarks;
Central ray alignment is paramount – perpendicular to the film for AP and centered to the T6 vertebra for lateral views. Shielding is essential to minimize radiation exposure to sensitive gonadal regions.
Image evaluation focuses on vertebral body height, disc space narrowing, and any signs of instability or pathological processes.

Head & Neck Positioning
Precise head and neck positioning is crucial for obtaining diagnostic images of the skull, sinuses, and mastoid processes, utilizing PA, lateral, and specialized views.
Skull Positioning: PA and Lateral Views
Achieving accurate skull radiography demands meticulous attention to patient positioning and technique. For a PA projection, the patient should be positioned with the orbitomeatal line (a line from the external auditory meatus to the superior orbit) perpendicular to the image receptor.
Central ray is directed perpendicularly to the mid-sagittal plane, entering at the external occipital protuberance. Lateral views require the patient to be positioned with the side of the head closest to the image receptor.
The central ray enters at a point 1-2 inches anterior to the external auditory meatus. Proper alignment ensures symmetrical visualization of cranial structures, minimizing distortion and optimizing diagnostic quality. Careful consideration of patient anatomy and potential artifacts is essential for optimal results.
Mastoid Views: Laws View and Variations
The Laws view is a specialized radiographic projection utilized to visualize the mastoid process, crucial for evaluating mastoiditis and other temporal bone pathologies. This technique involves angling the X-ray beam approximately 15 degrees caudally.
The patient is positioned with the affected side closest to the image receptor, and the central ray is directed towards the mastoid process. Variations of the Laws view exist, adjusting the angle to better demonstrate specific anatomical landmarks.
Proper positioning ensures clear visualization of the mastoid air cells, allowing for accurate assessment of inflammation or structural abnormalities. Precise technique minimizes superimposition and optimizes diagnostic information, aiding in effective patient care.
Sinus Radiography Techniques
Sinus radiography employs several techniques to visualize the paranasal sinuses, aiding in the diagnosis of sinusitis, obstructions, and other related conditions. Common projections include the occipitomental (OM) view, where the patient’s chin is elevated, and the lateral view.
The OM projection directs the central ray perpendicular to the sagittal plane, entering at the nasion and exiting at the external occipital protuberance. Careful patient positioning is vital to avoid superimposition of teeth and orbital structures.
Variations may include open-mouth or closed-mouth techniques, influencing the visualization of specific sinuses. Accurate technique ensures optimal image quality, facilitating precise evaluation of sinus anatomy and pathology.

Advanced Positioning Techniques
Specialized techniques like tube shift radiography and localization methods enhance diagnostic accuracy by providing detailed anatomical information and precise imaging.
Tube Shift Radiography for Localization
Tube shift radiography is a crucial localization technique employed when a foreign object or anatomical structure’s precise location is uncertain. This method involves acquiring two radiographic images – one centered on the area of interest, and a second with the x-ray tube intentionally shifted perpendicularly.
By observing the degree of displacement of the object or structure on the two images, the radiographer can accurately determine its depth relative to the image receptor. This principle relies on geometric principles, allowing for a three-dimensional understanding based on two-dimensional projections.
Careful attention to collimation and patient positioning is vital for optimal results. This technique is particularly useful in identifying and localizing fractures, foreign bodies, and assessing the depth of soft tissue lesions, aiding in surgical planning and intervention.
Localization Techniques: Overview
Localization techniques in radiography are essential for pinpointing the exact spatial relationship of anatomical structures or foreign objects within the body. These methods move beyond standard projections to provide a more definitive understanding of depth and position, crucial for surgical planning and accurate diagnosis.
Common techniques include tube shift radiography, where two images taken with shifted tube angles reveal displacement, indicating depth. Taking radiographs at right angles offers another perspective, aiding in triangulation. Computed tomography (CT) provides detailed cross-sectional images, offering superior localization capabilities.
Selecting the appropriate technique depends on the clinical scenario and available resources. Accurate localization minimizes surgical complications and ensures effective treatment, highlighting the importance of mastering these specialized radiographic procedures.
Range of Motion Measurements in Radiography
Radiographic assessment of range of motion (ROM) provides objective data regarding joint flexibility and potential limitations. This is particularly valuable in evaluating trauma, post-surgical recovery, and chronic conditions affecting joint movement, like arthritis.
Measurements are typically taken at specific anatomical locations, such as the skull or extremities, documenting the degrees of movement possible in various planes. Tables correlating body parts with corresponding ROM measurements serve as essential references for comparison and analysis.
Accurate positioning is paramount during ROM radiography to ensure reliable results. Documenting any limitations or pain experienced by the patient during the procedure is also crucial for a comprehensive clinical picture.

Resources & Further Learning
Bontrager’s Handbook remains a cornerstone resource for radiographic positioning, alongside consistent quality control practices to ensure optimal imaging standards and technique.
Bontrager’s Handbook: A Key Reference
Bontrager’s Handbook of Radiographic Positioning and Techniques, now in its seventh edition, stands as the definitive guide for radiographers seeking comprehensive and reliable information. This resource meticulously details proper patient positioning for a vast array of radiographic examinations.
It provides clear illustrations and step-by-step instructions, ensuring consistent application of techniques across various anatomical regions. The handbook isn’t merely a collection of positions; it emphasizes the why behind each technique, explaining the anatomical rationale and potential pitfalls.
Students and practitioners alike rely on Bontrager’s for its accuracy, clarity, and commitment to best practices in radiographic imaging. Regular updates reflect advancements in digital radiography and evolving clinical standards, making it an indispensable tool for quality patient care.
Quality Control in Radiographic Positioning
Maintaining rigorous quality control is paramount in radiographic positioning to ensure diagnostic image quality and minimize patient exposure. This involves consistent evaluation of several key factors, beginning with accurate patient positioning according to established protocols.
Regular assessment of central ray alignment, anatomical landmarks, and respiration control are crucial. Image evaluation should focus on identifying positioning errors – such as rotation or obliquity – that compromise visualization.
Furthermore, adherence to ALARA principles (As Low As Reasonably Achievable) is essential, optimizing technique to reduce radiation dose while maintaining image clarity. Documentation of quality control checks and corrective actions demonstrates a commitment to patient safety and optimal imaging practices.